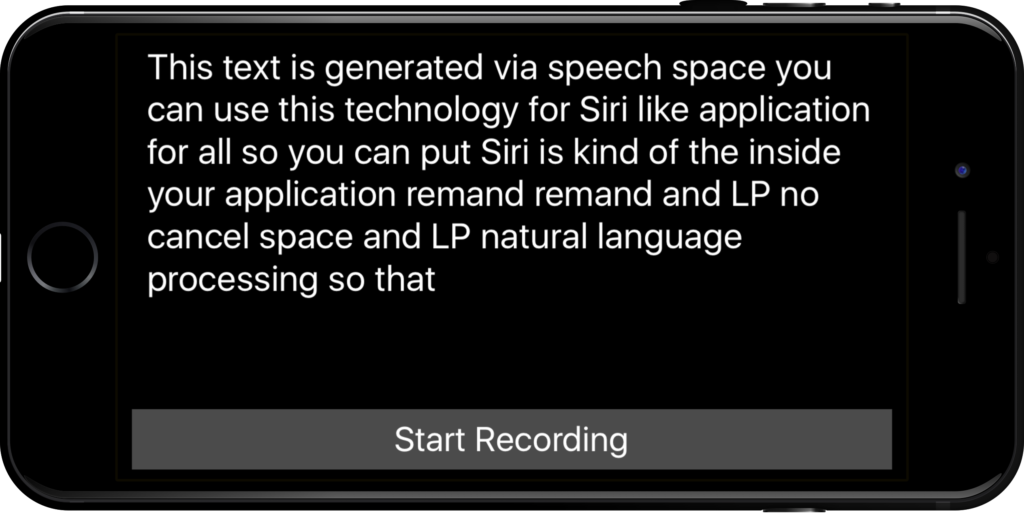
Speech recognition is the automatic process of converting audio of human speech into text. In iOS 10, there is a Speech framework , same technology used for Siri and Dictation.
To make app that can understand the context of what you are saying, maybe you need to learn more about Natural Language Processing (NLP).
1. Create an Xcode Project
Lets create an single view app with Xcode.
Add this key in the Info.plist and add with appropriate reasons.
Privacy - Speech Recognition Usage Description
Also add for microphone permission as well.
Privacy - Microphone Usage Description
2. User Interface
Open the Main.storyboard, we will make a scene that have a Text View and a Button like this.

Declare it as textView and recordButton respectively.
@IBOutlet var textView : UITextView!
@IBOutlet var recordButton : UIButton!
3. Request authorization
Now back to ViewController.swift.
Add this code on the top of ViewController.swift.
import Speech
We need to request authorization from user to use this capability. Add this line of codes at ‘viewDidLoad’.
SFSpeechRecognizer.requestAuthorization { authStatus in
  // use main thread in case of changing UI
  OperationQueue.main.addOperation {
    switch authStatus {
    case .authorized:
      // approved
      break
    case .denied:
      // not approved
      break
    case .restricted:
      // speech recognition restricted
      break
    case .notDetermined:
      // not yet authorized
      break
    }
  }
}
4. Declare SFSpeech and Additional Variables
Declare bunch of related SFSpeech classes, SFSpeechRecognizer, SFSpeechAudioBufferRecogitionRequest, and SFSpeechRecognitionTask.
We will use AVAudioEngine to generate audio signals, process them, and perform audio input and output.
let speechRecognizer = SFSpeechRecognizer(locale: Locale(identifier: "en-US"))!
var recognitionRequest: SFSpeechAudioBufferRecognitionRequest?
var recognitionTask: SFSpeechRecognitionTask?
let audioEngine = AVAudioEngine()
We instantiated a Speech Recognizer for “en-US” locale.
Here is the print from supportedLocales(), that list out all the locales that being supported by SFSpeechRecognizer.
Available Locales
* th-TH
* ca-ES
* fr-BE
* de-CH
* sk-SK
* en-ZA
* es-CL
* zh-CN
* zh-TW
* da-DK
* el-GR
* he-IL
* pt-BR
* en-AE
* pt-PT
* fr-CH
* ro-RO
* vi-VN
* en-SA
* pl-PL
* es-US
* en-SG
* tr-TR
* hr-HR
* ko-KR
* uk-UA
* it-CH
* ar-SA
* id-ID
* en-IN
* es-ES
* de-AT
* en-IE
* cs-CZ
* es-CO
* zh-HK
* sv-SE
* en-PH
* en-ID
* en-CA
* nl-NL
* yue-CN
* en-NZ
* en-GB
* ja-JP
* it-IT
* ru-RU
* en-US
* ms-MY
* es-MX
* hu-HU
* fr-CA
* de-DE
* fr-FR
* fi-FI
* nb-NO
* nl-BE
* en-AU
5. Start Recording
Lets add a magic function that can record and initiate the speech recognition.
private func startRecording() throws {

  // Cancel the previous task if it's running.
  if let recognitionTask = recognitionTask {
      recognitionTask.cancel()
      self.recognitionTask = nil
  }

  let audioSession = AVAudioSession.sharedInstance()
  try audioSession.setCategory(AVAudioSessionCategoryRecord)
  try audioSession.setMode(AVAudioSessionModeMeasurement)
  try audioSession.setActive(true, with: .notifyOthersOnDeactivation)

  recognitionRequest = SFSpeechAudioBufferRecognitionRequest()

  guard let inputNode = audioEngine.inputNode else { fatalError("Audio engine has no input node") }
  guard let recognitionRequest = recognitionRequest else { fatalError("Unable to created a SFSpeechAudioBufferRecognitionRequest object") }

  // Configure request so that results are returned before audio recording is finished
  recognitionRequest.shouldReportPartialResults = true

  // A recognition task represents a speech recognition session.
  // We keep a reference to the task so that it can be cancelled.
  recognitionTask = speechRecognizer.recognitionTask(with: recognitionRequest) { result, error in
      var isFinal = false

      if let result = result {
          self.textView.text = result.bestTranscription.formattedString
          isFinal = result.isFinal
      }

      if error != nil || isFinal {
          self.audioEngine.stop()
          inputNode.removeTap(onBus: 0)

          self.recognitionRequest = nil
          self.recognitionTask = nil

          self.recordButton.isEnabled = true
          self.recordButton.setTitle("Start Recording", for: [])
      }
  }

  let recordingFormat = inputNode.outputFormat(forBus: 0)
  inputNode.installTap(onBus: 0, bufferSize: 1024, format: recordingFormat) { (buffer: AVAudioPCMBuffer, when: AVAudioTime) in
      self.recognitionRequest?.append(buffer)
  }

  audioEngine.prepare()

  try audioEngine.start()

  textView.text = "Go ahead, I'm listening~~ "
}
6. Declare and Conform with SFSpeechRecognizerDelegate
Implement SFSpeechRecognizerDelegate by adding to the top at class declaration.
And we want to implement this method to get call back from the speech recognizer when the avalaibility is changed.
Add this inside viewDidLoad.
speechRecognizer.delegate = self
// MARK: SFSpeechRecognizerDelegate
public func speechRecognizer(_ speechRecognizer: SFSpeechRecognizer, availabilityDidChange available: Bool) {
  if available {
    recordButton.isEnabled = true
    recordButton.setTitle("Start Recording", for: [])
  } else {
    recordButton.isEnabled = false
    recordButton.setTitle("Recognition not available", for: .disabled)
  }
}
7. Add IBAction from Button
Open in assistant mode, where you can see Main.storyboard and ViewController.swift side-by-side. Create an IBAction from the button to this function.
// MARK: Actions
@IBAction func recordButtonTapped(_ sender: UIButton) {
  if audioEngine.isRunning {
      audioEngine.stop()
      recognitionRequest?.endAudio()
      recordButton.isEnabled = false
      recordButton.setTitle("Stopping", for: .disabled)
  } else {
      try! startRecording()
      recordButton.setTitle("Stop recording", for: [])
  }
}

Extras
Use this library to make Siri-like waveform link.