Updated code for Xcode 8, Swift 3. But seems have issue on this setup.
When developing apps for iOS, there are plenty of external libraries that are very useful so that we don’t have to reinvent the wheel to get the same benefit. You can can shorten the time of development.
Normally, to use a library you have a copy of the library put it somewhere on your computer, then make a copy to a new projects. Here is the issue, in many cases libraries are keep updating, so you might lost track with versioning and keep up to date with the latest.
CocoaPods is a dependency manager for Swift and Objective-C Cocoa projects. It has over 22 thousand libraries and is used in over 1 million apps. CocoaPods can help you scale your projects elegantly.
CocoaPods Mac App
Setup CocoaPods with command line can be intimidating for beginners. But by using native CocoaPods app (Link) it will ease the gap. Go to the website and download the app for free. Direct Download
Get Xcode Started
Open Xcode, create new project, ‘Single View Application’, name is as SpringWithCocoaPods and the details as below.

Save the project where you can locate it easily like on the Desktop. Now close the project for now.
Create the Podfile
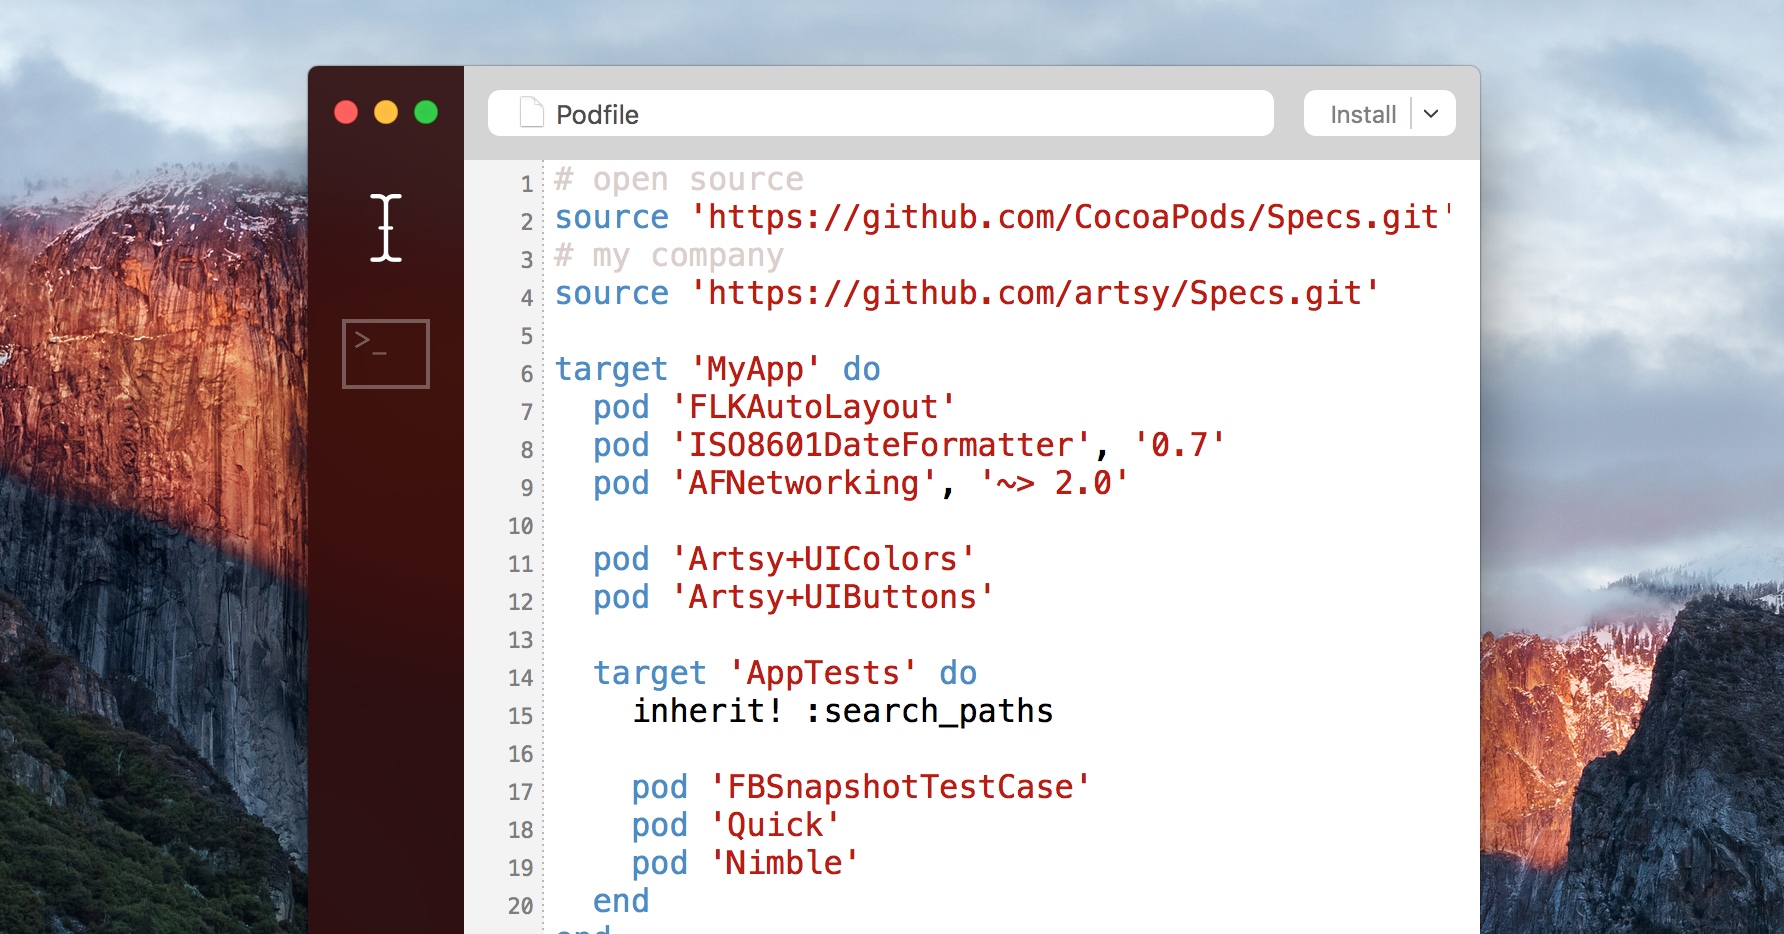
Open the CocoaPods Mac App, the user interface as image below.

Go to File > New Podfile from Xcode Project.
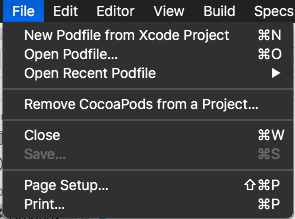
Find the SpringWithCocoaPods.xcodeproj, and click Open.

You will see something like this.

Note: Currently I project name that have ‘space’ on its title will have some error when openned with CocoaPods app.
This is the Podfile, a Ruby code to write dependancies that you need. For this tutorial we will install a framework called Spring.
Springwill enhance of utilizing Xcode’s Storyboard, with for better visual design, animation and utilities.
To add Spring framework, replace the content of Podfile with this code.
project 'SpringWithCocoaPods.xcodeproj'

# Uncomment this line to define a global platform for your project
# platform :ios, '9.0'

target 'SpringWithCocoaPods' do
  # Comment this line if you're not using Swift and don't want to use dynamic frameworks
  use_frameworks!
  pod 'Spring', :git => 'https://github.com/MengTo/Spring.git', :branch => 'swift3'

end

post_install do |installer|
  installer.pods_project.targets.each do |target|
    target.build_configurations.each do |config|
      config.build_settings['SWIFT_VERSION'] = '3.0'
        end
    end
end
In essense, we actually just added a CocoaPods repository dubbed as pod for Spring framework with this line of code.
pod 'Spring', :git => 'https://github.com/MengTo/Spring.git', :branch => 'swift3'
To find other pods, you can browse this site https://cocoapods.org
Now, click Install button on the top right side. On the background work, it will fetch the dependencies from the source GitHub and added to the Xcode Project. Make sure the result of integration is successful like this.

If not successful please check with the syntax. Or the the source file changed. You may need to refer to the GitHub documentation.
Open the Xcworkspace File
Open the SpringWithCocoaPods folder, now you can see there is a new file called SpringWithCocoaPods.xcworkspace. Open the file with Xcode.
Xcworkspace works almost like the normal Xcodeproj file, but Xcworkspace supports multi Xcodeproj inside the project.
If you see the Project navigator, there are 2 Xcodeproj; i) SpringWithCocoaPods and ii) Pods. The first is the normal project file come when you create new Xcode project.
The second part ‘Pods’ was generated when you install it from CocoaPods. To reveal frameworks and file that we have installed expand the Pods folder, as we can see Spring folder.
Make sure your current buildable target is ‘SpringWithCocoaPods’ at the top menu.
Storyboard
Open the Main.storyboard file, we can see a blank ViewController scene. Drag button in to scene. Select the button and go to Identity inspector, name the class as DesignableButton as image below.

Make sure that there is no warning appeared here. If the class is not exist, there will be yellow warning sign. It might caused from improper CocoaPods installation.
While the button is seletected, open the Attribute inspector, you can see the top menu is called Designable Button. Change the ‘Border color’ to blue, ‘Border width’ to 1 and ‘Corner radius’ to 3. As you can see on the picture below, the effect appears immediately on Storyboard.
This just show us that the framework is working on order, and you have just installed the pod from CocoaPods properly. ?

Close from a Modal
Add a new View Controller on the storyboard. Lets call it second scene. Connect the created button to the new View Controller with Show action segue like below.
Copy the button and paste it on the second scene. Change the title as ‘Close’. Now right-click from the button to the Exit / Unwind segue symbol, and choose unwindToViewController: like animation below.
Run the App
After we install the CocoaPods, the app’s target has become multiple targets and current buildable target might not selected on the right target. Make sure the target is SpringWithCocoaPods like the image below.

Hit Run, and it will open the iPhone 5 simulator. By tapping the button will open the second scene, and tapping the close button will close the scene. Did you noticed we didn’t use any single line of code.?

Update Your Podfile
After a while your pod might be out to date. What you have to do is to open Podfile file with CocoaPods app. Click Install to update your pod libraries.
Where to Go From Here
We already build a solid foundation of using CocoaPods with the CocoaPods app. To install another pod like popular networking framework Alamofire, open back Podfile add this line of code
pod 'Alamofire'
after line pod 'Spring' ..., and click Install again. The process will update the Xcworkspace automatically, even the project is currently open you don’t have to restart.
Reference:
CocoaPods
CocoaPods Guide
Use CocoaPods with Swift