We will build a simple Blog Post web app applying CRUD operations with Laravel 8, Bootstrap 5 and React. CRUD is stand for Create, Read, Update and Delete. It’s a core and important feature on a web app.
Getting Prepared
This project is a continuation of a previous part, and most of the information can be referred to Creating CRUD App with Laravel 8.
Creating the Project
Run this command to create a Laravel app named myposts.
composer create-project laravel/laravel:^8.6.12 myposts
Go to the project folder.
cd myposts
To checking out Laravel Version. cd to the created myposts folder and run this command to check your Laravel version. In this case is Laravel Framework 8.83.27.
php artisan --version
Run Server
Laravel is equipped with its own server. You may need to run the server at a long time for testing and debugging, it’s advisable to open a new tab or window to run this command.
php artisan serve
By having the command running, you may open the web app by visiting localhost:8000 with your browser.

Installing Packages
Moment
Moment.js is a JavaScript library that helps developers work with dates and times in a simple and flexible way. It provides a set of functions and utilities to parse, manipulate, format, and display dates and times in web applications.
Install the moment via npm:
npm install moment
React Router
react-router-dom is a popular library for handling routing in React applications. It allows you to create single-page applications (SPAs) with multiple views or pages that can be navigated by changing the URL, without the need for full-page refreshes. We can create nested routes, enabling complex page layouts with multiple levels of navigation.
Install the react-router-dom via npm:
npm install react-router-dom@^5.3.4
laravel/ui
This package provide a basic starting point using Bootstrap, React, and / or Vue that will be helpful for many applications.
Install the laravel/ui via composer:
composer require laravel/ui
Notes:
Since Laravel 8 is used in this project. The compatible version of laravel/ui is version ^3.0. More information.
Generate basic scaffolding.
php artisan ui react
Next run below command to install npm and start compiling and always listen each time we make changes to react file:
npm install
npm run watch
Notes:
If there is a message as shown below:
    Additional dependencies must be installed. This will only take a moment.

    Running: npm install resolve-url-loader@^5.0.0 --save-dev --legacy-peer-deps

    Finished. Please run Mix again.
Simply just run npm run watch command again.
Views & Basic Templating with Blade & React
Setup Frontend Project Directory
Before we get to code on our project its a good practice to manage project directory first.
- Create a
reactfolder insideresourcesfolder. - Create
pagesandcomponentsfolder insidereactfolder. - Create an
appfolder insideviewsfolder. - Create a
layoutsfolder insideappfolder.

Inside layouts, create a new view file named master.blade.php. This will be our master template which has the place to yield the content.
<!DOCTYPE html>
<html lang="en">
<head>
  <meta charset="UTF-8">
  <meta name="viewport" content="width=device-width, initial-scale=1.0, maximum-scale=1.0001, user-scalable=no" >
  <meta http-equiv="X-UA-Compatible" content="ie=edge">
  <title>BlogPost</title>
  <link rel="stylesheet" href="{{ mix('css/app.css') }}" />

</head>
<body>

    <div class="container">
        @yield('content')
    </div>

<script src="{{ mix('js/app.js') }}"></script>

</body>
</html>
Next, remove all the code inside welcome.blade.php and paste the content of welcome.blade.php as follows to set up a placeholder <div> element on the web page where a React component will be displayed.
@extends('app.layouts.master')

@section('content')

<div id="WelcomePage"></div>
<script src="{{mix('js/WelcomePage.js')}}"></script>

@endsection
React Router App
Create another JavaScript file inside resources/react/pages with a name WelcomePage.js.
import React, { Component } from "react";
import ReactDOM from "react-dom";
import { HashRouter, Route, Switch, Link } from "react-router-dom";

import Navbar from "../components/Navbar";
import AllPostPage from "./AllPostPage";
import PostPage from "./PostPage";
import CreateUpdatePage from "./CreateUpdatePage";

class WelcomePage extends Component {
    render() {
        return (
            <>
                <Navbar />
                <div className="container">
                    <Switch>
                        <Route exact path="/">
                            <MainPage />
                        </Route>
                        <Route path="/create">
                            <CreateUpdatePage />
                        </Route>
                        <Route path="/posts/:id/edit">
                            <CreateUpdatePage />
                        </Route>
                        <Route path="/posts/:id">
                            <PostPage />
                        </Route>
                        <Route path="/posts">
                            <AllPostPage />
                        </Route>
                    </Switch>
                </div>
            </>
        );
    }
}

function MainPage() {
    return (
        <div>
            <h1>Welcome Home</h1>
            <p className="lead">
                This app will do CRUD for Post model with Laravel.
            </p>
            <hr />

            <Link to="/posts" className="btn btn-info me-2">
                View Posts
            </Link>
            <Link to="/create" className="btn btn-primary">
                Add New Post
            </Link>
        </div>
    );
}

export default WelcomePage;

const element = document.getElementById("WelcomePage");
if (element) {
    const props = Object.assign({}, element.dataset);
    ReactDOM.render(
        <HashRouter>
            <WelcomePage {...props} />
        </HashRouter>,
        element
    );
}
Above code represents a simple React application that uses React Router for navigation. It defines several components for different pages and renders them based on the URL path. Here’s a breakdown of the code:
- Imports: The code imports necessary modules and components, including React, ReactDOM, React Router components (HashRouter, Route, Switch, Link), and custom components like Navbar, AllPostPage, PostPage, and CreateUpdatePage.
-
WelcomePage Component: This is the main component for the application. It renders a Navbar and uses React Router’s
SwitchandRoutecomponents to handle different routes. Depending on the route, it displays various sub-components likeMainPage,CreateUpdatePage,PostPage, andAllPostPage. Each route corresponds to a different page of the application. -
MainPage Function: This is a simple functional component that represents the home page. It displays a welcome message and provides links to view existing posts and add new posts.
-
Rendering: At the end of the code, the
WelcomePagecomponent is rendered within aHashRouter. The application retrieves props from an HTML element with the id “WelcomePage” and passes them to theWelcomePagecomponent.
This code sets up a basic React application with routing to handle different pages, making it easy to create a CRUD (Create, Read, Update, Delete) interface for a Post model.
webpack.mix.js
When you want to add a new React.js component to your project and you’re using Laravel Mix, webpack.mix.js is a configuration file that helps you manage the asset compilation process.
Next open webpack.mix.js and replace all code with below:
const mix = require("laravel-mix");

mix.js("resources/js/app.js", "public/js")
    .react()
    .sass("resources/sass/app.scss", "public/css");

mix.js("resources/react/pages/WelcomePage.js", "public/js/").react().version();
In essence, the webpack.mix.js file, with the .react() method included, makes it easy to compile React.js components alongside your JavaScript and CSS files. It’s a streamlined way to manage the asset compilation process when working with React in a Laravel application.
Create another JavaScript file inside resources/react/pages with a name AllPostPage.js. This page will shows all of the saved post from the database and and render it into a card.
import React, { Component } from "react";
import axios from "axios";
import { Link } from "react-router-dom";

class AllPostPage extends Component {
    constructor(props) {
        super(props);

        this.state = {
            posts: undefined,
        };
    }

    componentDidMount() {
        this.callAPI();
    }

    callAPI() {
        let url = `/api/posts`;

        axios
            .get(url)
            .then((res) => {
                this.setState({
                    posts: res.data.posts,
                });
            })
            .catch((e) => {});
    }

    render() {
        const { posts } = this.state;
        return (
            <div className="container mt-4">
                <div className="d-flex flex-direction-row justify-content-between align-items-center">
                    <h1 className="mb-4">Post List</h1>
                    <Link className="btn btn-primary" to={"/create"}>
                        Add a new one?
                    </Link>
                </div>
                <hr />
                <div className="row g-4 mt-1">
                    {posts !== undefined && posts.length > 0 ? (
                        posts.map((post, index) => {
                            return (
                                <div
                                    className="col-lg-4"
                                    key={post.id}
                                    id={index}
                                >
                                    <div className="card shadow">
                                        <div className="card-body">
                                            <p className="btn btn-success rounded-pill btn-sm">
                                                {post.category}
                                            </p>
                                            <Link
                                                to={`/posts/${post.id}`}
                                                style={{
                                                    textDecoration: "none",
                                                }}
                                            >
                                                <div className="card-title fw-bold text-primary h4">
                                                    {post.title}
                                                </div>
                                            </Link>
                                            <p className="text-secondary">
                                                {`${post.content.substring(
                                                    0,
                                                    30
                                                )}${
                                                    post.content.length > 30
                                                        ? "... "
                                                        : ""
                                                }`}
                                                {post.content.length > 30 && (
                                                    <Link
                                                        to={`/posts/${post.id}`}
                                                        style={{
                                                            textDecoration:
                                                                "none",
                                                        }}
                                                    >
                                                        Read More
                                                    </Link>
                                                )}
                                            </p>
                                        </div>
                                    </div>
                                </div>
                            );
                        })
                    ) : (
                        <h2 className="text-center text-secondary p-4">
                            No post found in the database!
                        </h2>
                    )}
                </div>
            </div>
        );
    }
}

export default AllPostPage;
Create another JavaScript file inside resources/react/pages with a name PostPage.js.
import React, { Component } from "react";
import moment from "moment";

import axios from "axios";
import { Link, withRouter } from "react-router-dom";

class PostPage extends Component {
    constructor(props) {
        super(props);

        this.state = {
            post: undefined,
        };
    }
    componentDidMount() {
        this.callAPI();
    }

    callAPI() {
        const { id } = this.props.match.params;

        let url = `/api/posts/${id}`;

        console.log(`url`, url);

        axios
            .get(url)
            .then((res) => {
                console.log(url, res.data.post);

                this.setState({
                    post: res.data.post,
                });
            })
            .catch((e) => {});
    }

    handleDelete = () => {
        const { id } = this.props.match.params;
        // Add user verification before deleting post
        let result = confirm("Delete the post ?");
        // None happen if user choose 'cancel'
        if (result == false) {
            return;
        }

        axios
            .delete(`/api/posts/${id}`)
            .then((res) => {
                // Handle the successful deletion, e.g., redirect to another page.
                // You may want to add error handling here as well.
                this.props.history.push("/posts"); // Redirect to the home page or another appropriate location.
            })
            .catch((error) => {
                console.error("Delete request error: ", error);
            });
    };

    render() {
        const { post } = this.state;
        if (!post) {
            // Render a loading message or spinner while waiting for the API response.
            return <div>Loading...</div>;
        }
        return (
            <div className="row my-4">
                <div className="col-lg-8 mx-auto">
                    <div className="card shadow">
                        {/* <img
                            src={`/storage/images/${post.image}`}
                            className="img-fluid card-img-top"
                            alt={post.title}
                        /> */}
                        <div className="card-body p-5">
                            <div className="d-flex justify-content-between align-items-center">
                                <p className="btn btn-dark rounded-pill">
                                    {post.category}
                                </p>
                                <p className="lead">
                                    {moment(post.created_at).fromNow()}
                                </p>
                            </div>

                            <hr />
                            <h3 className="fw-bold text-primary">
                                {post.title}
                            </h3>
                            <p>{post.content}</p>
                        </div>
                        <div className="card-footer px-5 py-3 d-flex justify-content-end">
                            <Link
                                to={`/posts/${post.id}/edit`}
                                className="btn btn-success rounded-pill me-2"
                            >
                                Edit
                            </Link>
                            <button
                                onClick={this.handleDelete}
                                className="btn btn-danger rounded-pill"
                            >
                                Delete
                            </button>
                        </div>
                    </div>
                </div>
            </div>
        );
    }
}

export default withRouter(PostPage);
The PostPage component is responsible for displaying information about a single post retrieved from an API. This component fetches the post data on mounting, allows users to delete the post, and provides options to edit or delete the post. It also displays the post’s category, creation date, title, and content.
Create another JavaScript file inside resources/react/pages with a name CreateUpdatePage.js.
import React, { Component } from "react";
import axios from "axios";
import { withRouter } from "react-router-dom";

class CreateUpdatePage extends Component {
    constructor(props) {
        super(props);
        this.state = {
            title: "",
            category: "",
            content: "",
            image: "",
            errors: {},
            isEdit:
                props.match.params.id &&
                props.location.pathname.includes("edit"),
        };
    }

    componentDidMount() {
        if (this.state.isEdit) {
            this.fetchPostData();
        }
    }

    fetchPostData = () => {
        const { match } = this.props;
        axios
            .get(`/api/posts/${match.params.id}`)
            .then((response) => {
                const { title, category, content } = response.data.post;
                this.setState({ title, category, content });
            })
            .catch((error) => {
                console.error("Error fetching post data:", error);
            });
    };

    handleInputChange = (e) => {
        const { name, value } = e.target;
        this.setState({ [name]: value });
    };

    handleFileChange = (e) => {
        this.setState({ file: e.target.files[0] });
    };

    handleSubmit = (e) => {
        e.preventDefault();

        const { title, category, content, file, isEdit } = this.state;

        let params = {
            title: title,
            category: category,
            content: content,
        };

        const { match, history } = this.props;

        const apiUrl = isEdit ? `/api/posts/${match.params.id}` : "/api/posts";

        if (isEdit) {
            console.log("This is running...");
            axios
                .patch(apiUrl, params)
                .then((response) => {
                    console.log(
                        "Post created/updated successfully:",
                        response.data
                    );

                    // After a successful post creation/update, navigate to the /posts page
                    history.push("/posts");
                })
                .catch((error) => {
                    if (error.response && error.response.data) {
                        this.setState({
                            errors: error.response.data.errors,
                        });
                    }
                    console.error("Error creating/updating post:", error);
                });
        } else {
            axios
                .post(apiUrl, params)
                .then((response) => {
                    console.log(
                        "Post created/updated successfully:",
                        response.data
                    );

                    // After a successful post creation/update, navigate to the /posts page
                    history.push("/posts");
                })
                .catch((error) => {
                    if (error.response && error.response.data) {
                        this.setState({
                            errors: error.response.data.errors,
                        });
                    }
                    console.error("Error creating/updating post:", error);
                });
        }
    };

    render() {
        const { errors, isEdit } = this.state;
        const buttonText = isEdit ? "Update Post" : "Add Post";

        return (
            <div className="row my-3">
                <div className="col-lg-8 mx-auto">
                    <div className="card shadow">
                        <div className="card-header text-white bg-primary fw-bold fs-3">
                            {isEdit ? "Update Post" : "Add New Post"}
                        </div>
                        <div className="card-body p-4">
                            <form
                                onSubmit={this.handleSubmit}
                                encType="multipart/form-data"
                            >
                                {/* ... Input fields for title, category, file, and content ... */}
                                <div className="my-2">
                                    <input
                                        type="text"
                                        name="title"
                                        value={this.state.title}
                                        onChange={this.handleInputChange}
                                        className={`form-control ${
                                            errors.title ? "is-invalid" : ""
                                        }`}
                                        placeholder="Title"
                                    />
                                    {errors.title && (
                                        <div className="invalid-feedback">
                                            {errors.title}
                                        </div>
                                    )}
                                </div>

                                <div className="my-2">
                                    <input
                                        type="text"
                                        name="category"
                                        value={this.state.category}
                                        onChange={this.handleInputChange}
                                        className={`form-control ${
                                            errors.category ? "is-invalid" : ""
                                        }`}
                                        placeholder="Category"
                                    />
                                    {errors.category && (
                                        <div className="invalid-feedback">
                                            {errors.category}
                                        </div>
                                    )}
                                </div>

                                <div className="my-2">
                                    <textarea
                                        name="content"
                                        value={this.state.content}
                                        onChange={this.handleInputChange}
                                        rows="6"
                                        className={`form-control ${
                                            errors.content ? "is-invalid" : ""
                                        }`}
                                        placeholder="Post Content"
                                    />
                                    {errors.content && (
                                        <div className="invalid-feedback">
                                            {errors.content}
                                        </div>
                                    )}
                                </div>

                                <div className="my-2">
                                    <input
                                        type="submit"
                                        value={buttonText}
                                        className={`btn ${
                                            isEdit
                                                ? "btn-success"
                                                : "btn-primary"
                                        }`}
                                    />
                                </div>
                            </form>
                        </div>
                    </div>
                </div>
            </div>
        );
    }
}

export default withRouter(CreateUpdatePage);
The CreateUpdatePage component is responsible for both creating and updating posts. It manages form inputs and provides error handling for form validation. Errors in form input are displayed, and upon successful submission, the user is redirected to the /posts page.
Create a new JavaScript file inside resources/react/components with a name Navbar.js.
import React, { Component } from "react";
import ReactDOM from "react-dom";
import { Link } from "react-router-dom";

class Navbar extends Component {
    constructor(props) {
        super(props);

        this.state = {};
    }
    render() {
        return (
            <nav className="navbar navbar-expand-lg navbar-light bg-light mb-4">
                <div className="container-fluid">
                    <Link className="navbar-brand" to="/">
                        BlogPost
                    </Link>
                    <hr className="my-0 mx-4 border-primary" />
                    <div className="d-flex flex-row ml-auto">
                        <Link className="nav-link me-3" to="/">
                            Home
                        </Link>
                        <Link className="nav-link" to="/posts">
                            Posts
                        </Link>
                    </div>
                </div>
            </nav>
        );
    }
}

export default Navbar;
Configure ENV for Database
Before we run the server, we may need to configure our database at .env file. Edit these configuration suit your MySQL configuration.
DB_CONNECTION=mysql
DB_HOST=127.0.0.1
DB_PORT=3306
DB_DATABASE=myposts
DB_USERNAME=root
DB_PASSWORD=root
Next open up your chosen DBMS and create a new database with a name myposts. Below shown an example of using HeidiSQL to create database.

Create the Models & Controllers
In Laravel, model is using Eloquent ORM to communicate with database. Run this command to create a new model called Post and its migration file .
php artisan make:model Post -m
Notes:
-m : Stand for migrations
Now create the controller with a name PostController with below command
php artisan make:controller PostController --api
If you open PostController file, its almost similar if we use normal --resource flag instead of --api.
The --api flag generate a controller with fewer default methods because APIs often have simpler requirements compared to web applications that might need additional views and routes for HTTP request.
Defining Schema & Database Migration
Lets modified up() function in 2023_09_26_104936_create_posts_table.php migration file located at database/migrations/ to add more fields
public function up() {

  Schema::create('posts', function (Blueprint $table) {
    $table->id();
    $table->string('title');
    $table->string('category');
    $table->longText('content');
    $table->string('image')->nullable();
    $table->timestamps();
  });

}
Run the migration with this command.
php artisan migrate
Notes: you might need to change the .env file and also refresh the cache.
php artisan cache:clear
If something bad happened we can rollback.
php artisan migrate:rollback
Laravel Routing
Routing is a core element for Laravel. It defines all the routes that possible to your web app.
For this version of Laravel, look up for routes folder, there are 3 files:
- api.php can register API routes for your application.
- console.php is where you may define all of your Closure based console commands.
- web.php tell Laravel the URIs it should respond to using a Closure or controller method.
Now open the api.php file and paste below code:
<?php

use Illuminate\Http\Request;
use Illuminate\Support\Facades\Route;
use App\Http\Controllers\PostController;

Route::apiResource('posts', PostController::class);
The api.php file in a Laravel application defines routes specifically for handling API requests. Below is a summary of the routes and their associated functionalities:
- Resourceful Routes for Posts: This file uses the
Route::apiResource()method to define RESTful routes for managing posts. These routes are linked to thePostControllerclass, which handles various HTTP methods (GET, POST, PUT, DELETE) for interacting with posts. The generated routes include endpoints like/posts(index),/create(create),/posts/{id}(show),/posts/{id}/edit(update), and/posts/{id}(destroy), following RESTful conventions.
These routes make it easy to perform CRUD (Create, Read, Update, Delete) operations on posts through API requests.
Notes:
To check available routes in this project, run below command:
php artisan route:list

Now try to refresh the page, and you should see something nicer as this.

PostController.php – Handling Post Resources
Before we manage the methods in the API, open the PostController.php located in app\Http\Controllers and import the following class to the PostController.php.
<?php

namespace App\Http\Controllers;

use Illuminate\Http\Request; // Available by default

use App\Models\Post; // This need to be imported
use Illuminate\Support\Facades\Storage; // This need to be imported
use Illuminate\Support\Facades\Validator; // This need to be imported
- GET index(Request $request): This method handles the main page for the
/postsroute. It allows fetching all of the posts.
    public function index(Request $request)
    {
        $posts = Post::orderBy('id', 'desc')->get();
        return response()->json(['posts' => $posts]);
    }
- POST store(Request $request): The
storemethod handles the creation of new posts. It validates the incoming request data for title, category, content, and an image file. If validation passes, it stores the image in the ‘public/images’ directory, creates a new Post model instance, and saves the post data in the database. It responds with a success message upon successful post creation.
    public function store(Request $request)
    {
        $validator = Validator::make($request->all(),[
            'title' => 'required|string|max:255',
            'category' => 'required|string|max:255',
            'content' => 'required|string',
        ]);

        if ($validator->fails()){
            return response()->json(['errors'=>$validator->errors()], 422);
        }

        $post = new Post();

        $post->title = $request->title;
        $post->category = $request->category;
        $post->content = $request->content;
        $post->save();

        // Return a JSON response indicating success
        return response()->json(['message' => 'Post added successfully', 'status' => 'success']);
    }
- GET show($id): The
showmethod is intended to display a single post. It fetches and returns a specific post by its ID.
    public function show($id)
    {
            $post = Post::find($id);

            if (!$post) {
                return response()->json(['error' => 'Post not found'], 404);
            }

            return response()->json(['post' => $post]);
    }
- PUT/PATCH update(Request $request, $id): The
updatemethod handles updating an existing post. It validates incoming data for title, category, and content. If validation passes, it updates the post data, handling image upload and deletion if necessary, and saves the updated post. It responds with a success message upon successful update.
    public function update(Request $request, $id)
    {
        $post = Post::find($id);

        $validator = Validator::make($request->all(),[
            'title' => 'required|string|max:255',
            'category' => 'required|string|max:255',
            'content' => 'required|string',
        ]);

        if ($validator->fails()){
        return response()->json(['errors'=>$validator->errors()], 422);
        }

        // Update the post data
        $post->title = $request->title;
        $post->category = $request->category;
        $post->content = $request->content;

        // Save the updated post
        $post->save();

        return response()->json(['message' => 'Post updated successfully'], 200);
    }
- DELETE destroy(Post $post): The
destroymethod handles post deletion. It first checks if the post exists and deletes its associated image file. Then, it deletes the post itself and responds with a success message indicating the deletion.
    public function destroy(Post $post) {
        // Check if the post exists
        if (!$post) {
            return response()->json(['message' => 'Post not found'], 404);
        }

        // Delete the image file
        Storage::delete('public/images/' . $post->image);

        // Delete the post
        $post->delete();

        return response()->json(['message' => 'Post deleted successfully']);
    }
This controller file follows RESTful conventions for managing post resources, facilitating CRUD operations within a Laravel application.
App Demonstration
Creating a Post

Viewing All Post

Show Single Post

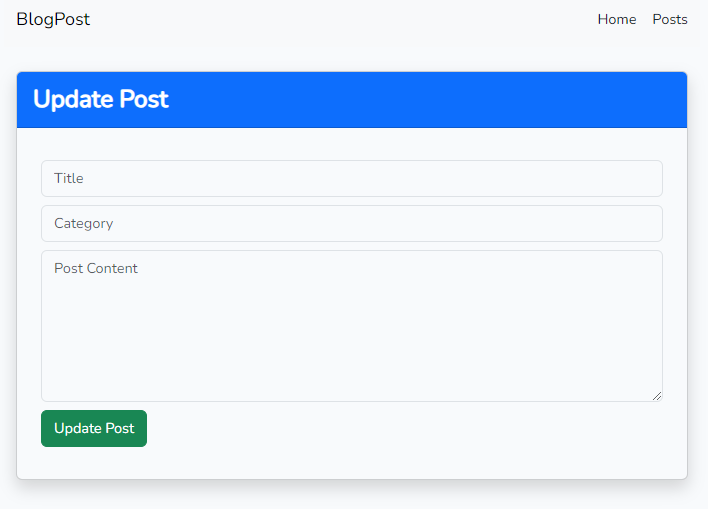
Updating a Post
Summary
We have just created a simple blog post app with React.js and Laravel 8. This project also introduce on how to use navigation with react-router-dom and also developing a RESTful API with apiResource on the backend.
If you have any questions or concerns, please don’t hesitate to leave a comment below.
Resources
Laravel Official
Laravel Tutorial
Creating CRUD App with Laravel 8
Github Repo