We will build a simple Blog Post web app applying CRUD operations with Laravel 8 and Bootstrap 5. CRUD is stand for Create, Read, Update and Delete. It’s a core and important feature on a web app.

Getting Prepared
This guide will not be exhaustive and cover every detail of Laravel and it does expect a few prerequisites.
1. Install Composer
Composer is a PHP dependancy manager. We will using Composer to install Laravel. Download it from here.
2. Install MySQL
By using app like MAMP or XAMPP there is a feature to start MySQL too. You may choose your own solution like install manually MySQL to your machine.
Alternatively, you can directly install MySQL to your machine. Follow this link to download and install.
3. Code Editor
I personally recommend VS Code to edit your code.
4. MySQL Client
To manage MySQL database I highly recommend to use desktop application like Table Plus, HeidiSQL or Sequel Ace (Mac). It’s free and only for Mac App Store Link. Please find simlar program if you on other platforms.
* Shell (For Windows User)
For Windows user, you probably need a good shell command prompt. For Linux and Mac should be fine.
Recommended to use Laragon as it has terminal, composer & MySQL.
Start Developing
Let’s start to create our new Laravel web app.
Creating the Project
Run this command to create a Laravel app named myposts.
$ composer create-project laravel/laravel:^8.6.12 myposts
Go to the project folder.
$ cd myposts
Yahoo! We just create our new Laravel web app. Sometime we just want to checking our Laravel Version. cd to the created myposts folder and run this command to check your Laravel version.
$ php artisan --version
Run Server
Laravel is equipped with its own server. You may need to run the server at a long time for testing and debugging, it’s advisable to open a new tab or window to run this command.
$ php artisan serve
By having the command running, you may open the web app by visiting localhost:8000 with your browser.

Configure ENV for Database
Before we run the server, we may need to configure our database at .env file. Edit these configuration suit your MySQL configuration.
DB_CONNECTION=mysql
DB_HOST=127.0.0.1
DB_PORT=3306
DB_DATABASE=myposts
DB_USERNAME=root
DB_PASSWORD=root
Next open up your chosen DBMS and create a new database with a name myposts. This example is using HeidiSQL to manage our database.

Create the Models & Controllers
In Laravel, model is using Eloquent ORM to communicate with database. Run this command to create a new model called Post.
$ php artisan make:model Post -mcr
The -mcr flag in the php artisan make:model command in Laravel is a shorthand for generating several files and components commonly associated with a model. For more info about console command please check Laravel 8 documentation.
Notes:
-m : Stand for migrations
-cr: Resourceful controller
This create A model class named Post in the app\Models\Post.php directory.
By default, we don’t need to specify which table we want to interact with because it’s automatically link to ‘posts’ table. Notice that the model name is singular and start with capital letter, while table name is plural and all at lowercase. This is a name convention that we need to follow the ‘Laravel’ way.
In case you need to use custom table use this
protected $table = 'custom_posts';.
We have 2 controllers; PageController is a normal controller and PostController is a resource controller (which is used for CRUD operation).
Let’s create a normal controller called PageController.
$ php artisan make:controller PagesController
Now, Laravel will generate new files inside app/Http/Controllers/. We have PagesController.php and PostController.php.
Open the PagesController, and add a new function called home().
public function home()
{
  return 'Welcome home!';
}
Now you may test run the app, and you will see a simple text Welcome home!.
If you open PostController file, it’s packed with many predefined method, because we use special option “r” in -mcr flag to create the controller.
Defining Schema & Database Migration
In Laravel to define the database we have to create migration file so that Laravel can create database tables with its field for us, by defining inside the file. Since we have use ‘m’ in -mcr flag, the migration file has been created automatically.
Below command is use to generate a migration file manually to create a table named posts.
$ php artisan make:migration create_posts_table --create=posts
This will create a file inside database/migration. Open the migration file name ended with create_posts_table.php.
We actually need to add more fields, so we have to edit the file to be like this inside the up() function.
public function up()
{
    Schema::create('posts', function (Blueprint $table) {
        $table->id();
        $table->string('title');
        $table->string('category');
        $table->longText('content');
        $table->string('image')->nullable();
        $table->timestamps();
    });
}
Run the migration with this command.
$ php artisan migrate
Notes: you might need to change the .env file and also refresh the cache.
$ php artisan cache:clear
If something bad happened we can rollback.
$ php artisan migrate:rollback
Laravel Routing
Routing is a core element for Laravel. It defines all the routes that possible to your web app.
For this version of Laravel, look up for routes folder, there are 3 files:
- api.php can register API routes for your application.
- console.php is where you may define all of your Closure based console commands.
- web.php tell Laravel the URIs it should respond to using a Closure or controller method.
We only interested to web.php. Now open the file and replace the entire content with these lines of codes.
<?php

use Illuminate\Support\Facades\Route;
use App\Http\Controllers\PagesController;

Route::get('/', [PagesController::class, 'home']);

Route::resource('posts', 'App\Http\Controllers\PostController');
We just added 2 routes; ‘/’ and to ‘posts’.
'/' the the main route when you open the website, it routing to a controller called PageController for a home() function. And the route being refered as ‘home‘ for for future reference or linking. It’s a GET method route.
'/posts' route is a resource route which assigned to typical ‘CRUD’ controller (PostController) which predefined with loads of functions.
Notes: To check available routes in this project, run below command:
php artisan route:list

Views & Basic Templating with Blade
Laravel use Blade templating system, that’s why the view file have filename ended with .blade.php. With Blade there is rules to make the content more dynamic as we will learn by reading the codes.
The views are inside resouces/views folder. Use subfolder to better manage the views system.
Let’s create subfolder named ‘layouts‘, inside it create a new view file named ‘master.blade.php‘. This will be our master template which has the navigation bar and the place to yield the content.
<!DOCTYPE html>
<html lang="en">

<head>
  <meta charset="UTF-8">
  <meta http-equiv="X-UA-Compatible" content="IE=edge">
  <meta name="viewport" content="width=device-width, initial-scale=1.0">
  <title>@yield('title')</title>

   <link href="https://cdn.jsdelivr.net/npm/bootstrap@5.3.2/dist/css/bootstrap.min.css" rel="stylesheet" integrity="sha384-T3c6CoIi6uLrA9TneNEoa7RxnatzjcDSCmG1MXxSR1GAsXEV/Dwwykc2MPK8M2HN" crossorigin="anonymous">
</head>

<nav class="navbar navbar-expand-lg navbar-light bg-light">
  <div class="container">
    <button class="navbar-toggler" type="button" data-bs-toggle="collapse" data-bs-target="#navbarNav" aria-controls="navbarNav" aria-expanded="false" aria-label="Toggle navigation">
      <span class="navbar-toggler-icon"></span>
    </button>
    <div class="collapse navbar-collapse" id="navbarNav">
      <ul class="navbar-nav ml-auto">
        <li class="nav-item">
          <a class="nav-link" href="{{ url('/') }}">Home</a>
        </li>
        <li class="nav-item">
          <a class="nav-link" href="{{ url('posts') }}">Posts</a>
        </li>
      </ul>
    </div>
  </div>
</nav>

<main>
    <div class="container">
        @yield('content')
    </div>
</main>

  <script src="https://cdn.jsdelivr.net/npm/bootstrap@5.3.2/dist/js/bootstrap.bundle.min.js" integrity="sha384-C6RzsynM9kWDrMNeT87bh95OGNyZPhcTNXj1NW7RuBCsyN/o0jlpcV8Qyq46cDfL" crossorigin="anonymous"></script>
</body>

</html>
Lets create another subdirectory inside views folder named pages, create a new file named home.blade.php.
@extends('layouts.master')

@section('content')

<h1>Welcome Home</h1>
<p class="lead">This app will do CRUD for Post model with Laravel.</p>
<hr>

<a href="{{ url('posts') }}" class="btn btn-info">View Posts</a>
<a href="{{ url('posts/create') }}" class="btn btn-primary">Add New Post</a>

@endsection
Back to PagesController, we have to do some modification to show our newly created view file. Replace home() function to like this one.
public function home()
{
  return view('pages.home');
}
Now try to refresh the page, and you will see something nicer like this.

Tasks Controller
Let’s open PostController.php and see all the functions that is pre-created. All is used for displaying the page with GET and also other HTTP vers to handle the functions.
- GET index the main page of for /posts route.
- GET create will be the method we use to generate a page where we can create new posts.
- POST store will be the method we use to handle POST data from the post creation, and store it in the database.
- GET show will be the method used to show a single post.
- GET edit will be the method used to allow us to edit an existing post.
- PUT/PATCH update will be the method that gets called for updating an existing post.
- DELETE destroy delete the post.
Now we just need to edit inside the created functions within PostController. For starter let’s create the index() fuction to show the main route for that, then create the coresponding view.
public function index() {
  $posts = Post::orderBy('id', 'desc')->paginate(3);
  return view('posts.index', ['posts' => $posts]);
}
Create a subfolder inside view called ‘posts‘, and create a new blade file called ‘index.blade.php‘.
@extends('layouts.master')

@section('content')

<h1>Post List</h1>
<p class="lead">All your posts. <a href="{{ route('posts.create') }}">Add a new one?</a></p>
<hr>

@if(session('message'))
<div class="alert alert-{{ session('status') }} alert-dismissible fade show" role="alert">
  <strong>{{ session('message') }}</strong>
  <button type="button" class="btn-close" data-bs-dismiss="alert" aria-label="Close"></button>
</div>
@endif

<div class="row g-4 mt-1">
  @forelse($posts as $key => $row)
  <div class="col-lg-4">

      <div class="card shadow">
        <a href="posts/{{ $row->id }}">
          <img src="{{ asset('storage/images/'.$row->image) }}" class="card-img-top img-fluid">
        </a>
        <div class="card-body">
          <p class="btn btn-success rounded-pill btn-sm">{{ $row->category }}</p>
          <div class="card-title fw-bold text-primary h4">{{ $row->title }}</div>
          <p class="text-secondary">{{ Str::limit($row->content, 100) }}</p>
        </div>
      </div>

  </div>
  @empty
    <h2 class="text-center text-secondary p-4">No post found in the database!</h2>
  @endforelse
  <div class="d-flex justify-content-center my-5">
    {{ $posts->onEachSide(1)->links() }}
  </div>

</div>
@endsection
Now you may take a look at ‘posts’ page by click from navigation.
Creating a Record
We will edit the PostController to support create() and store() functions.
Creating a Post
Let’s create edit create() function inside PostController.
public function create() {
  return view('post.create');
}
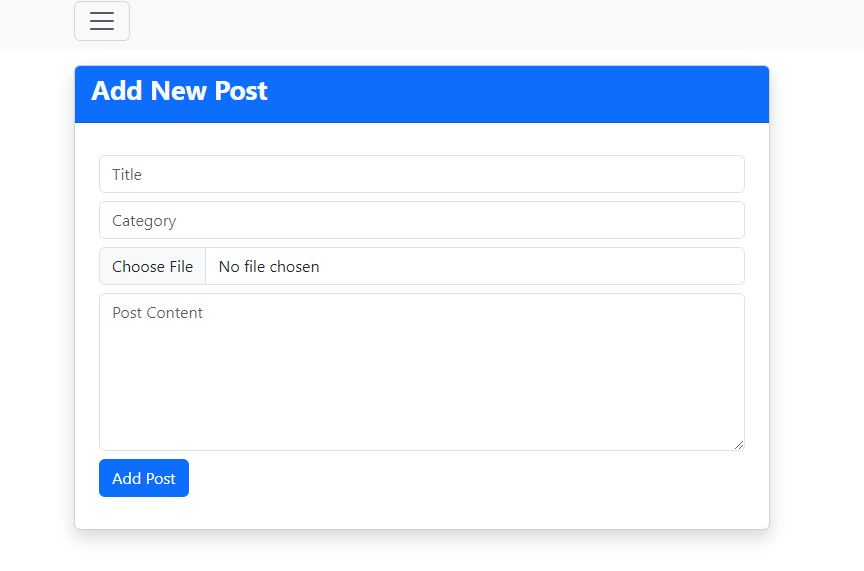
Create a view file ‘posts/create.blade.php‘.
@extends('layouts.master')

@section('content')

<div class="row my-3">
  <div class="col-lg-8 mx-auto">
    <div class="card shadow">
      <div class="card-header bg-primary">
        <h3 class="text-light fw-bold">Add New Post</h3>
      </div>
      <div class="card-body p-4">
        <form action="/posts" method="POST" enctype="multipart/form-data">
          @csrf
          <div class="my-2">
            <input type="text" name="title" id="title" class="form-control @error('title') is-invalid @enderror" placeholder="Title" value="{{ old('title') }}">
            @error('title')
              <div class="invalid-feedback">{{ $message }}</div>
            @enderror
          </div>

          <div class="my-2">
            <input type="text" name="category" id="category" class="form-control @error('category') is-invalid @enderror" placeholder="Category" value="{{ old('category') }}">
            @error('category')
              <div class="invalid-feedback">{{ $message }}</div>
            @enderror
          </div>

          <div class="my-2">
            <input type="file" name="file" id="file" accept="image/*" class="form-control @error('file') is-invalid @enderror">
            @error('file')
              <div class="invalid-feedback">{{ $message }}</div>
            @enderror
          </div>

          <div class="my-2">
            <textarea name="content" id="content" rows="6" class="form-control @error('content') is-invalid @enderror" placeholder="Post Content">{{ old('content') }}</textarea>
            @error('content')
              <div class="invalid-feedback">{{ $message }}</div>
            @enderror
          </div>

          <div class="my-2">
            <input type="submit" value="Add Post" class="btn btn-primary">
          </div>
        </form>
      </div>
    </div>
  </div>
</div>
@endsection
At PostController.php header. Add this lines of declaration.
use App\Models\Post;
use Session;
use Illuminate\Support\Facades\Storage;
To save the post into the database to work, we have to edit store() function. This will take all the input from the form and mapping into Task model automatically.
public function store(Request $request) {
    $request->validate([
    'title' => 'required',
    'category' => 'required',
    'content' => 'required|min:10',
    'file' => 'required|image|mimes:jpeg,png,jpg,gif,svg|max:5000',
    ]);

    $imageName = time() . '.' . $request->file->extension();

    $request->file->storeAs('public/images', $imageName);

    $post = new Post();

    $post->title = $request->title;
    $post->category = $request->category;
    $post->content = $request->content;
    $post->image = $imageName;

    $post->save();

  return redirect('/posts')->with(['message' => 'Post added successfully!', 'status' => 'success']);
}
Before posting a new post, we have to store all the images in the storage directory so to access those images from the public directory we have to run a simple command:
php artisan storage:link
Now try post something to verify whether if storing and retrieving works.

Show Single Item
Update PostController for show() function.
public function show(Post $post) {
  return view('posts.show', ['post' => $post]);
}
Create a view posts/show.blade.php**.
@extends('layouts.master')

@section('content')

<div class="row my-4">
  <div class="col-lg-8 mx-auto">
    <div class="card shadow">
      <img src="{{ asset('storage/images/'.$post->image) }}" class="img-fluid card-img-top">
      <div class="card-body p-5">
        <div class="d-flex justify-content-between align-items-center">
          <p class="btn btn-dark rounded-pill">{{ $post->category }}</p>
          <p class="lead">{{ \Carbon\Carbon::parse($post->created_at)->diffForHumans() }}</p>
        </div>

        <hr>
        <h3 class="fw-bold text-primary">{{ $post->title }}</h3>
        <p>{{ $post->content }}</p>
      </div>
      <div class="card-footer px-5 py-3 d-flex justify-content-end">
        <a href="/posts/{{$post->id}}/edit" class="btn btn-success rounded-pill me-2">Edit</a>
        <form action="/posts/{{$post->id}}" method="POST">
          @csrf
          @method('DELETE')
          <button type="submit" class="btn btn-danger rounded-pill">Delete</button>
        </form>
      </div>
    </div>
  </div>
</div>

@endsection
Next, you have to add one line code to the app/Providers/AppServiceProvider.php file. Just use the below codes inside the boot() method.
<?php

namespace App\Providers;

use Illuminate\Pagination\Paginator;
use Illuminate\Support\ServiceProvider;

class AppServiceProvider extends ServiceProvider
{
  public function register()
  {
      //
  }

  public function boot()
  {
      Paginator::useBootstrap();
  }
}

Updating a Post
Update the PostController edit() function.
public function edit(Post $post) {
  return view('posts.edit', ['post' => $post]);
}
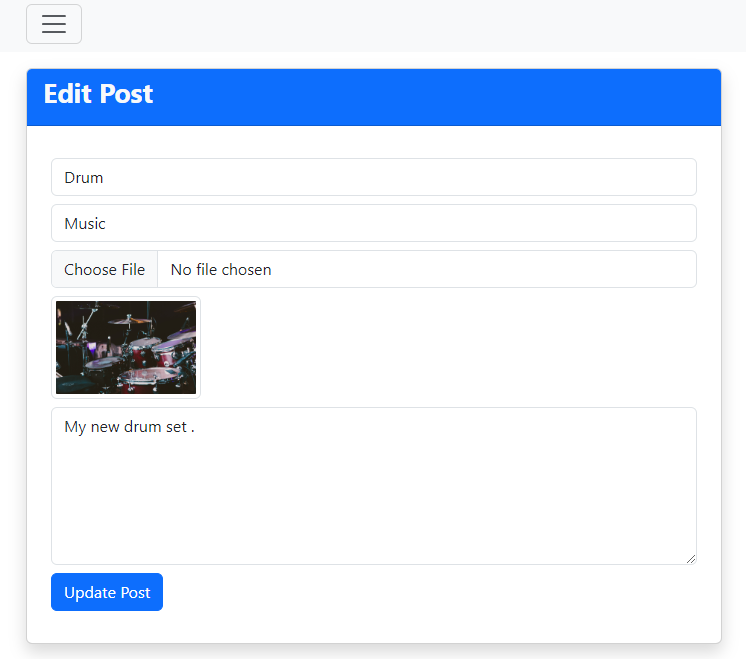
Create a new view file at posts/edit.blade.php.
@extends('layouts.master')

@section('content')

<div class="row my-3">
  <div class="col-lg-8 mx-auto">
    <div class="card shadow">
      <div class="card-header bg-primary">
        <h3 class="text-light fw-bold">Edit Post</h3>
      </div>
      <div class="card-body p-4">
        <form action="/posts/{{ $post->id }}" method="POST" enctype="multipart/form-data">
          @csrf
          @method('PUT')
          <div class="my-2">
            <input type="text" name="title" id="title" class="form-control" placeholder="Title" value="{{ $post->title }}" required>
          </div>

          <div class="my-2">
            <input type="text" name="category" id="category" class="form-control" placeholder="Category" value="{{ $post->category }}" required>
          </div>

          <div class="my-2">
            <input type="file" name="file" id="file" accept="image/*" class="form-control">
          </div>

          <img src="{{ asset('storage/images/'.$post->image) }}" class="img-fluid img-thumbnail" width="150">

          <div class="my-2">
            <textarea name="content" id="content" rows="6" class="form-control" placeholder="Post Content" required>{{ $post->content }}</textarea>
          </div>

          <div class="my-2">
            <input type="submit" value="Update Post" class="btn btn-primary">
          </div>
        </form>
      </div>
    </div>
  </div>
</div>
@endsection
To make the function edit possible let’s edit update() function at PostController.
public function update(Request $request, Post $post) {
    $imageName = '';
    if ($request->hasFile('file')) {
        $imageName = time() . '.' . $request->file->extension();
        $request->file->storeAs('public/images', $imageName);
        if ($post->image) {
            Storage::delete('public/images/' . $post->image);
        }
    } else {
        $imageName = $post->image;
    }

  $post->title = $request->title;
  $post->category = $request->category;
  $post->content = $request->content;
  $post->image = $imageName;
  $post->save();

  // Mass Assignment Way; Can do if add fields in to fillable.
    // $postData = ['title' => $request->title, 'category' => $request->category, 'content' => $request->content, 'image' => $imageName];
    // $post->update($postData);

    return redirect('/posts')->with(['message' => 'Post updated successfully!', 'status' => 'success']);
}
Deleting A Record
Let’s update PostController to support destroy() function.
public function destroy(Post $post) {
  Storage::delete('public/images/' . $post->image);
  $post->delete();
  return redirect('/posts')->with(['message' => 'Post deleted successfully!', 'status' => 'info']);
}
Now we can call the destroy() route when we show the single task at posts/show.blade.php.
Summary
We have just created the super common feature on a web app, which is CRUDing data. We can use this for many kinds of data, but for this example, we’re using “Post” which has a title and description. It may look simple, but it can be daunting if you are new and get stuck somewhere, possibly when integrating with the database.
There is more to learn about field data verification. We can also have other types of validation, such as checking the number of characters or verifying if it’s a valid email address.
So far, we have covered the simplest yet sweetest way to create a CRUD web app with Laravel.
If you have any questions or concerns, please don’t hesitate to leave a comment below.